Preventive maintenance and routine maintenance play an important part to keep your ProJet MJP 3D Printer in good condition. Neglecting the maintenance will affect the printing condition and the lifespan of the printer.
How would you know when the printer needs maintenance?
- A pop-up will appear on the UI to alert you.
- Go to Tools > Operator Maintenance from the UI and find out when is the next maintenance procedure.
- Set up email alerts to inform you when maintenance needs to be perform.

Routine Maintenance
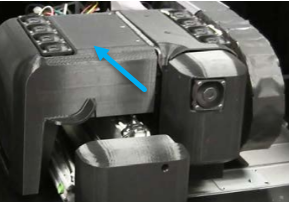
In the routine maintenance, it is important to keep your printer clean and free of debris by cleaning up any dust that has collected around the printhead and the surrounding areas. It is recommended to clean every week for light usage and every print for heavy usage.
What are the items needed?
- Nitrile gloves
- Lint free paper towels or a damp cloth
- Isopropyl alcohol or similar non-abrasive cleaner
- Vacuum or compressed air hose
What are the items to clean?
1. Build plate
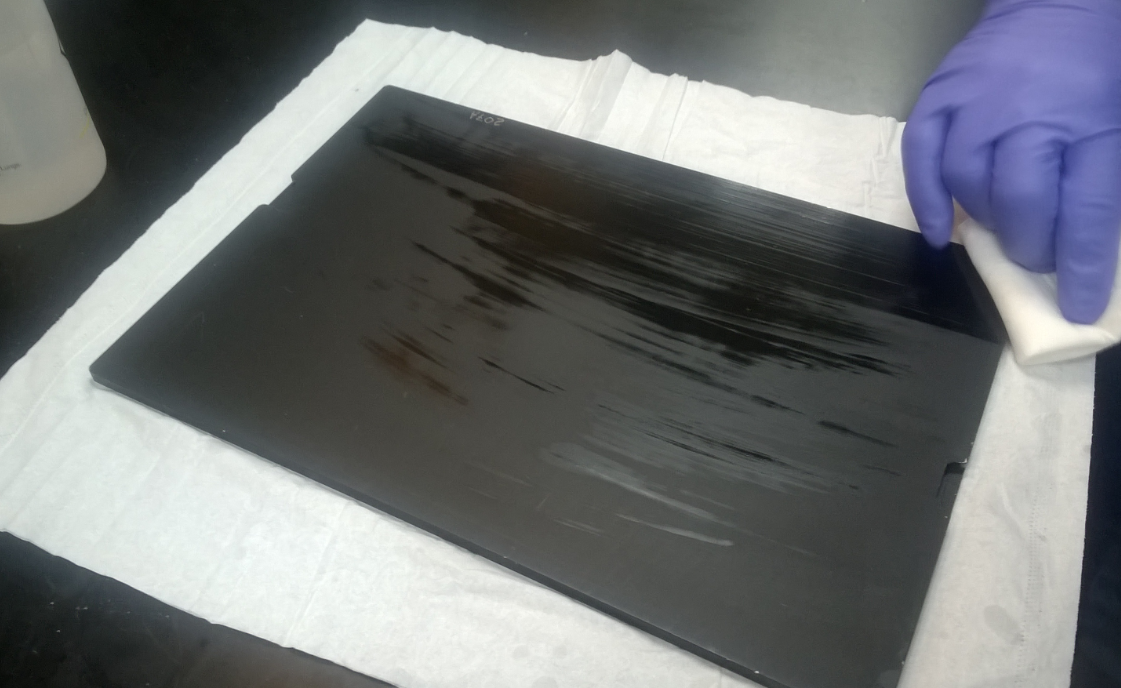
2. Inside and outside of Planarizer cover
Do not clean the underside of the printhead (Jet Stack). It will cause severe damage
3. Outside of printer
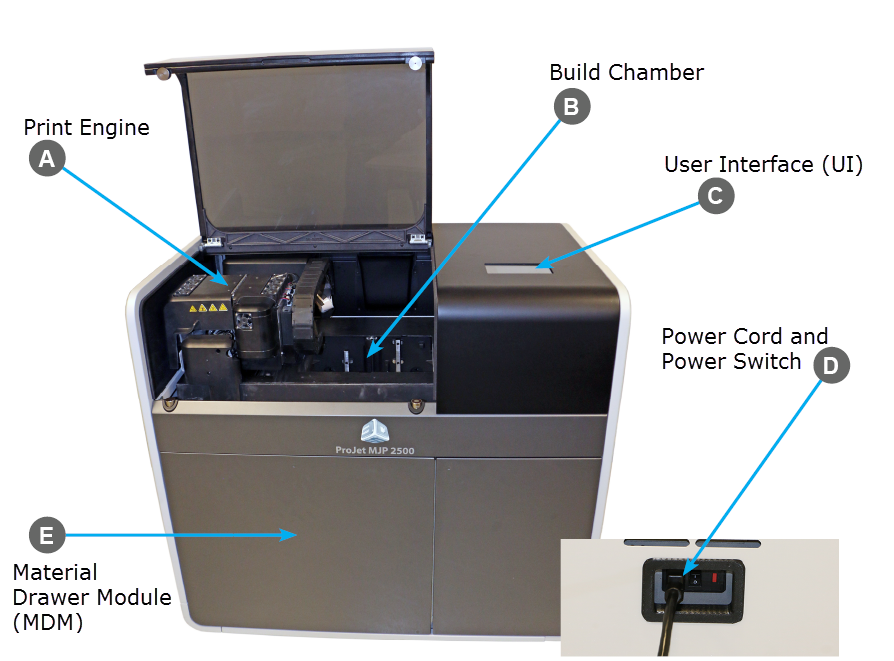
Material Cartridge
When the material cartridge is empty and required to replace or when you need to replace the partially filled container to full container, the following steps guide you to remove and install new material cartridge.
Please note that cartridges cannot be removed or installed from a cold printer. The printer must be warm before opening the drawer to remove the cartridge.
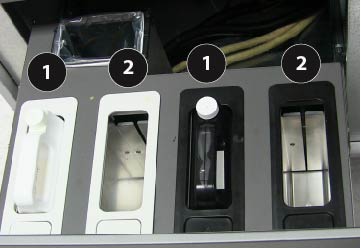
Support Material Containers 1 and 2 (White): These containers hold the VisiJet® M2 SUP support material that is used for the build. The support material is housed on the left side of the MDM in the white receptacles.
Part Material Containers 1 and 2 (Black): These containers hold the cartridges of the VisiJet® part material, which are used to build parts on the 3D printer system. The part material is housed on the right side of the MDM in the black receptacles.
What are the items needed?
- Nitrile gloves
- Protective clothing
- Goggles
- Isopropyl alcohol
What are the steps?
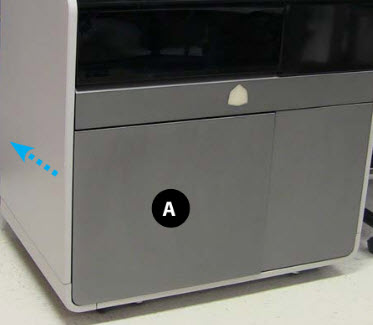
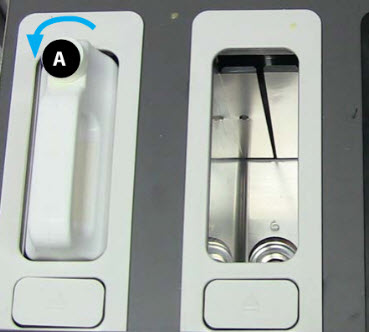
1. Push the MDM drawer inwards to open the panel as it is built with push/push mechanism.
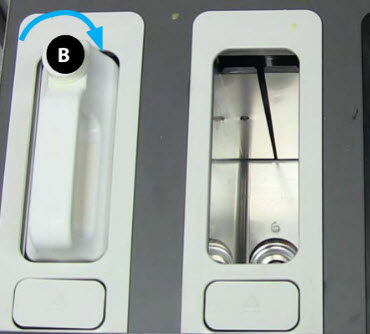
2. Turn the material cap (B) a ½ turn to clockwise to tighten the vent cap
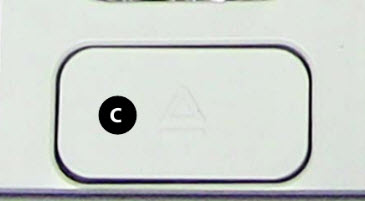
3. Press the release button (C) to release the cartridge. Pull the cartridge out of the slot.
4. Dispose the empty cartridge according to local regulations.
5. With the nitrile gloves on, use a disposable paper towel and wipe all material from the container seal assembly. If necessary, you can use some isopropyl alcohol on the paper towel to wipe up the excess material.
6. Place the new cartridge into the slot and push down until you hear it click in place.
7. Vent each cartridge by loosening the material cap (A) by a ½ turn counter-clockwise.
8. Close the MDM drawer until it is latched securely.
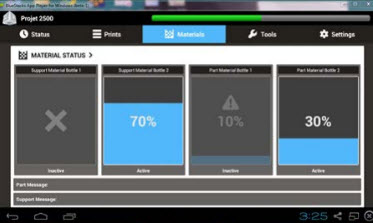
9. Check the material level under the Materials tab on the UI to ensure cartridge is ceded properly into MDM and ready to print.
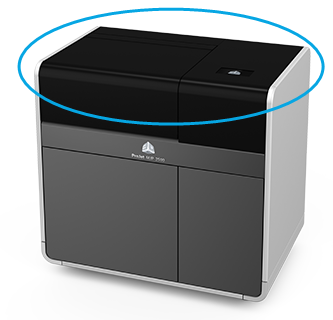
Polycarbonate Top Door
Do not use cleaners such as Windex and paper towels to clean the polycarbonate surfaces. Use only non-abrasive cleaner and a chem wipe or lint free cloth to avoid scratches on the surface.
- Spray a water-based solvent such as Simple Green onto the lint-free soft cloth. Do not wipe with a dry cloth or spray cleaner directly onto the touchscreen.
- Gently wipe the touchscreen to remove debris.
Avoid:
- Dry cloth on the touchscreen
- Any cleaning products that contain acetone, MEK or alcohol
- Any abrasive cleaning products. These cleaning products can damage the touchscreen.
Before cleaning, the 3D printer system must be idle to avoid aborting a build.